
No headings found
Zauberwürfel hat 8 Ecken und 8 Kanten, zusammen mit 6 Blöcken in der Mitte und alle müssen in der richtigen Position sein. Wenn Sie Ihren Zauberwürfel in der falschen Reihenfolge haben, können Sie ihn nicht lösen. In dieser Anleitung erfahren Sie, wie Sie einen Zauberwürfel auseinandernehmen und ihn auf die Werkseinstellungen zurücksetzen.
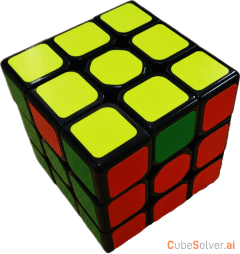
Wie zerlegt man den Zauberwürfel?
Viele Menschen haben Angst davor, ihren Zauberwürfel zu zerlegen, aber Tatsache ist, dass ein normaler 3x3-Zauberwürfel eine sehr einfache Struktur hat, die leicht wieder zusammengebaut werden kann. Befolgen Sie daher die nachstehenden Anweisungen, um zu erfahren, wie Sie einen Zauberwürfel auseinandernehmen. Bevor Sie beginnen, den Zauberwürfel zu Reparaturzwecken zu zerlegen, sollten Sie versuchen, den Würfel so weit wie möglich zu lösen, da dies anzeigt, welche Teile Sie austauschen müssen, und Sie nicht das Ganze auseinandernehmen müssen.
- Erster Schritt: Drehen Sie die Oberseite um 45 Grad.
- Entfernen eines Kantenstücks: Hebeln Sie ein oberes Kantenstück vorsichtig mit den Fingern oder bei Bedarf mit einem Schraubenzieher heraus.
- Nachfolgende Teile: Sobald das erste Randstück entfernt ist, lösen sich die angrenzenden Eckstücke, sodass die verbleibenden Teile des Zauberwürfels leichter entfernt werden können. Wenn Sie Schwierigkeiten haben, Teile herauszunehmen, können Sie die Spannung des Würfels ändern. Entfernen Sie die Kappen an den Mittelstücken und stellen Sie die Schrauben entsprechend ein. Die richtige Spannung gewährleistet ein reibungsloses Drehen und verhindert, dass Teile herausspringen.
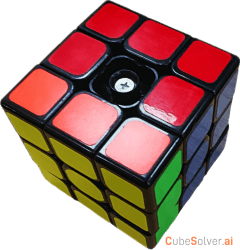
Wie baut man den Zauberwürfel wieder zusammen?
Nachdem Sie Ihren Zauberwürfel auseinandergenommen haben, müssen Sie ihn in der richtigen Reihenfolge wieder zusammenbauen. Befolgen Sie die nachstehenden Anweisungen, um zu erfahren, wie Sie einen Zauberwürfel wieder zusammensetzen.
- Ausgangspunkt: Beginnen Sie mit dem Kernmechanismus und einer Sammlung von Rand- und Eckstücken. Persönlich empfehle ich, ein gelbes Muster als Startebene zu verwenden, damit Sie wissen, dass die letzte Ebene aus weißen Mustern besteht.
- Erste Schicht: Setzen Sie die vier Randstücke einer Seite in den Kern ein und fügen Sie dann die entsprechenden Eckstücke hinzu.
- Mittelschicht: Schieben Sie die Randstücke der Mittelschicht hinein.
- Letzte Schicht: Bauen Sie die letzte Schicht zusammen, indem Sie die Rand- und Eckstücke einsetzen und ein Randstück als letztes übrig lassen.
- Abschluss der Montage: Setzen Sie das letzte Kantenstück vorsichtig ein und passen Sie die angrenzende Fläche bei Bedarf leicht an.
- Spannung neu einstellen: Stellen Sie die Spannung mit einem Schraubendreher ein und setzen Sie dann die Mittelkappe wieder auf.
Testen Sie, ob Ihr Zauberwürfel lösbar ist
Nachdem Sie Ihren Zauberwürfel zusammengebaut haben, müssen Sie testen, ob er lösbar ist. Dies ist der schnellste Weg, um festzustellen, ob Sie ihn richtig zusammengebaut haben. Wenn Sie mit dem Zauberwürfel noch nicht vertraut sind und es sehr schwierig finden, ihn selbst zu lösen, können Sie natürlich den [KI-Zauberwürfellöser] (https://cubesolver.ai/mobile-apps/) als Hilfe verwenden.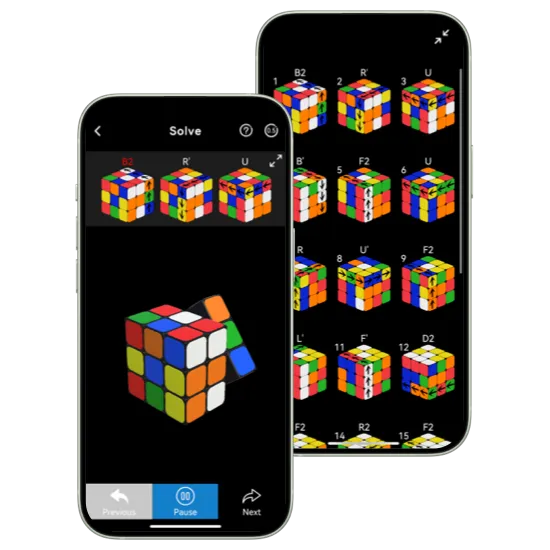

CubeSolver AI


Fazit
Wenn Sie diese Schritte befolgen, können Sie Ihren Zauberwürfel effektiv zerlegen und wieder zusammenbauen, sei es, um ihn in einen gelösten Zustand zurückzusetzen, ihn zu schmieren oder seinen internen Mechanismus zu erkunden.
Häufig gestellte Fragen zum Zerlegen eines Zauberwürfels
F: Wie löst man den Zauberwürfel?
Um die Spannung eines Zauberwürfels zu lösen, können Sie die folgenden Anweisungen befolgen:
- Nehmen Sie die Kappe vom Mittelblock einer beliebigen Schicht ab. Darunter befindet sich eine kleine Schraube.
- Lösen Sie die Schraube mit einem Schraubendreher. Dann wird Ihr Zauberwürfel gelöst und kann auseinandergenommen werden.
F: Wie zerlegt man einen Zauberwürfel?
Sie können einen Zauberwürfel mit den folgenden Schritten zerlegen:
- Drehen Sie die Ebene um 45 Grad.
- Nehmen Sie ein Randstück ab.
- Nehmen Sie die Eckstücke ab.
- Wiederholen Sie den zweiten Schritt, bis der gesamte Zauberwürfel zerlegt ist.