Why Switch to CFOP Algorithms
If you're still using the beginner method, your average solve time may be around 60 to 90 seconds. By switching to the CFOP method, you can often cut that time in half, reaching 30 seconds or less with regular practice. Here's why CFOP is more efficient:
- Fewer Moves: The beginner method often takes over 100 moves. CFOP averages around 55–60.
- Smarter Algorithms: CFOP uses specific algorithms, especially in OLL and PLL, to solve complex steps in one move sequence instead of several.
- F2L Pairing: Solving the Rubik's Cube edge and corner pairs together during F2L removes repetitive steps found in beginner methods.
- Improved Lookahead: CFOP helps develop the ability to see and plan upcoming moves while solving, a key skill in speedcubing.
Cross (White Cross Example)
Start by solving the four edge pieces on one face, usually the white face, to form a plus sign or "cross". Make sure each edge piece also matches the center color of the side it connects to. This step is important because a well-aligned cross sets up the rest of the solution.

Step 1. Locate the White Edge Pieces
To start, look for these pieces on the top or middle layers. These are the edges with a white sticker, and your goal is to position them correctly to form the cross. Keep an eye on their locations as you prepare to move them into place for the next steps.
Step 2: Move Each White Edge Piece to the Bottom
Once you've found the four white edge pieces, the next goal of CFOP Rubik's Cube is to move them to the bottom layer to begin forming the white cross. Each white edge should also match the center color of the side it touches. Here's how to handle different situations:
- Case 1. White Edge in the Top Layer (White Sticker on the Side)
If the white edge is in the top layer and the white sticker is on the side (not facing up), line it up with the center color on that face. For example, if it's the white-red edge, align it with the red center. Once aligned, turn the front face 180 degrees (F2) to move it to the bottom.
- Case 2: White Edge in the Top Layer (White Sticker Facing Up)
If the white sticker is facing up, first rotate the top layer (U, U', or U2) to place the piece above its matching center color. Then turn the front face 180 degrees (F2) to send it to the bottom layer.
- Case 3: White Edge in the Middle Layer
If the white edge is stuck in the middle layer, turn one of the side faces (like R, L, or F) to push it into the top layer. Once it's on top, follow Case 1 or Case 2 to move it to the bottom.

- Case 4: White Edge Already in the Bottom Layer (But Incorrectly Placed)
If a white edge is already on the bottom but in the wrong spot or not aligned correctly, rotate the bottom layer (using D or D') to move it out of the way. Then bring it back to the top or middle, fix its alignment, and move it back down correctly.
Step 3: Align All White Edges on the Bottom Layer
Now that all four white edge pieces are in the bottom layer, the next step is to make sure each one is correctly aligned with its matching center color. Rotate the bottom layer until each white edge sits between the correct center pieces.
For example, the white-red edge should be between the white center on the bottom and the red center on the side. Similarly, the white-blue edge should be between the white and blue centers. Once all four white edges are matched up with their corresponding centers, the white cross is complete, and you're ready to move on to the next step.
F2L (First Two Layers)
In this process, you'll solve both the first and second layers together by inserting four corner-edge pairs into their correct positions. Each pair is made up of:
- One corner piece that has white on it
- One edge piece that matches the two non-white colors of that corner
Unlike the beginner method, which solves all the white corners first and then the second layer edges separately, F2L combines these steps into one. You find a matching corner and edge, pair them up, and insert them into the correct slot between the centers of those two colors.
This approach is the key advantage of the CFOP method. By solving both layers as one process, you use fewer moves, usually around seven to nine per pair, which makes your solve faster and more efficient than the traditional layer-by-layer method.
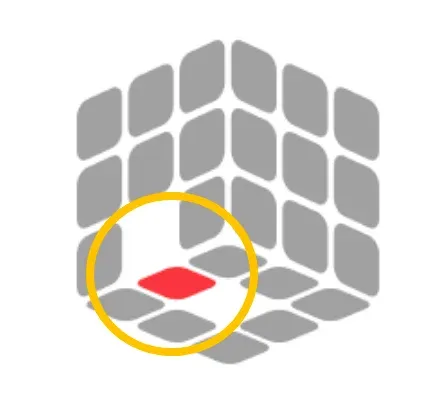
Step 1. Find an Unsolved Corner and the Matching Edge
Look at the top layer for a corner with a white sticker, like the white-red-green corner. Then, look for the red-green edge piece. This piece doesn't have white, but it matches the same two colors as your corner. These two pieces form a pair that you'll insert into the correct slot.
Step 2. Solve F2L Pairs
There are different F2L cases depending on where the corner and edge pieces are and how they are oriented. Below, we've listed the most common situations. You can identify the case that matches your current cube and follow the given algorithm to solve it.
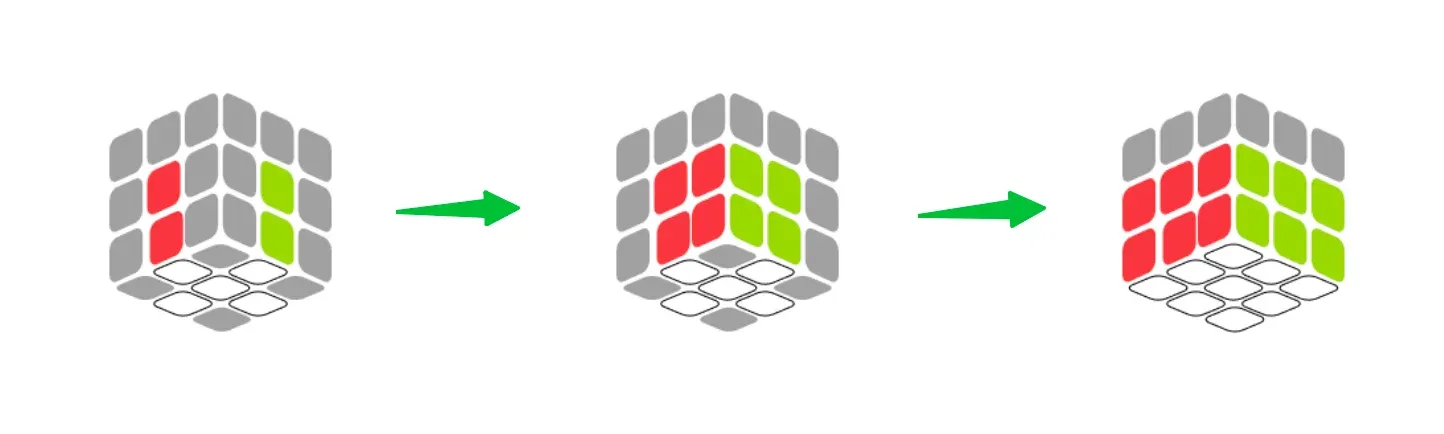
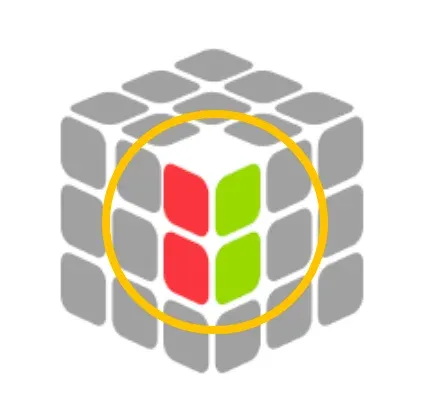
- Case 1: Both Pieces on the Top Layer with Stickers Facing Outward
This is one of the most common and beginner-friendly F2L cases. Both the corner and edge pieces are on the top layer, next to each other, with their important stickers facing the sides—not facing up or down. From this position, you can easily pair and insert them into the correct slot.
Algorithm (Right Slot): U R U' R'
Algorithm (Left Slot): U' L' U L
- Case 2: Corner and Edge on the Top Layer Facing Each Other (Headlights)
In this case, the corner and edge pieces are on opposite sides of the top layer with their matching stickers facing each other like they are facing off. Since they cannot be paired directly, you need to first separate them, adjust their positions, and then pair them before inserting them into the correct slot.
Right Slot Algorithm (most common form): U R U2 R' U R U' R'
Left Slot Version (mirrored logic): U' L' U2 L U' L' U L
- Case 3: Corner on Top, Edge in Middle Layer
In this case, the edge piece is stuck in the second layer while the matching corner is on the top layer. This often happens after you finish building the white cross. To pair them correctly, you need to move the edge back up to the top layer. You can do this by temporarily inserting any other corner and edge pair to push the edge out. For example, perform the moves: U R U' R'
This will bring the edge to the top, allowing you to treat it like Case 1 or Case 2. Always remove unpaired edges cleanly to avoid disturbing other completed F2L pairs.
- Case 4: White Sticker on Top of the Corner (Corner is Misoriented)
In this case, the corner is in the top layer (yellow face), but the white sticker is facing up, which makes pairing difficult (The edge is still in the top layer but isn't paired with the corner). To solve this, you need to reorient the corner so the white sticker isn't on top. Once that's done, you can pair the corner and edge together and insert them into their correct slot.
Move the corner to the correct spot: Place the corner above an empty slot (preferably the front-right slot). Here's how the algorithm works:
R U R' U': This part of the algorithm reorients the corner so that the white sticker is not facing up anymore. It brings the corner to a new position and starts the pairing process.
F' U' F: Now, this part inserts the edge and the corner together, forming a pair and placing it into the correct slot.
- Case 5. Corner Already in Slot, Edge on Top
The white corner is already placed in the bottom layer, but it's either turned the wrong way or missing its matching edge. The edge piece is still on the top layer, and the two are not paired. Since you can't insert them directly, you need to remove the corner from its slot first. Once it's out, you can pair it with the edge properly and then insert them together into the correct position.
R U R': This pulls the corner out without disturbing the rest of the cube too much. Then treat it as Case 1 or 2.
OLL (Orienting Last Layer)
Let's now go into Step 3 of the Rubik's Cube CFOP. This stage is all about making the entire last layer turn yellow (if white is your cross color), no matter where the pieces are located. There are 57 possible OLL cases in full CFOP, but beginners and even intermediate solvers often use the 2-Look OLL method, which reduces memorization.
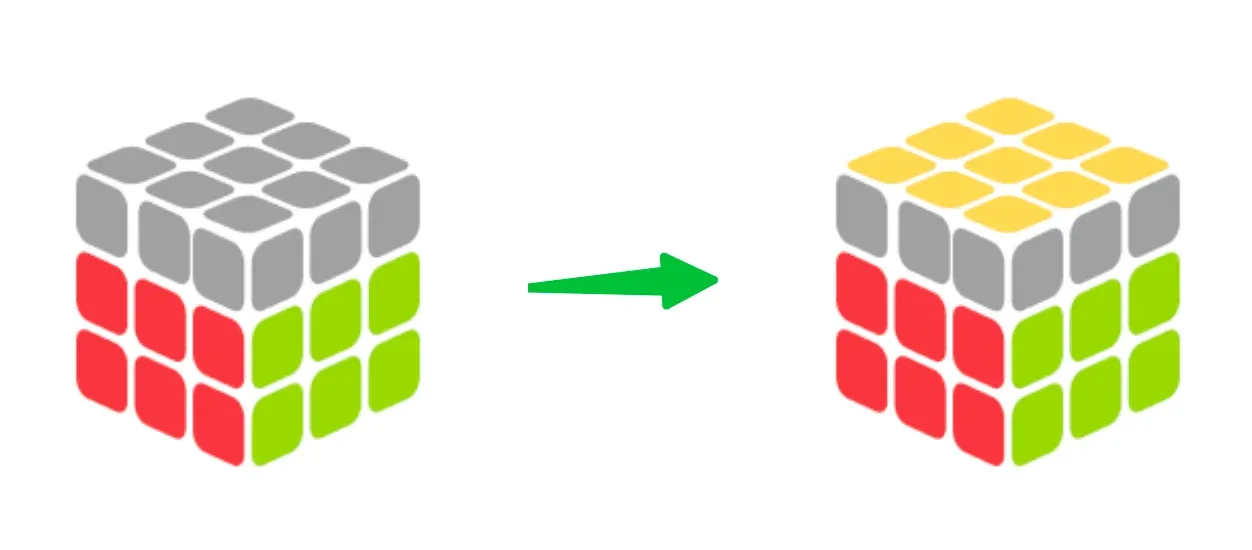
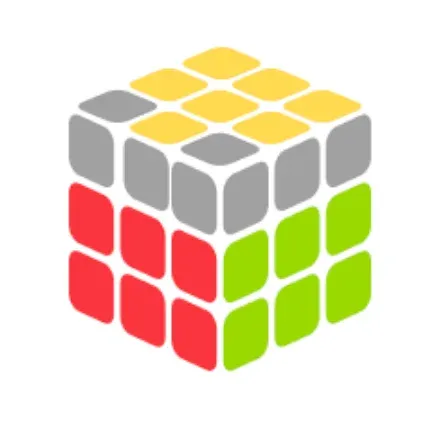
Step 1. Make a Yellow Cross (orient all yellow edges)
There are four common situations you might see during this step. Check the current state of your cube, then choose the matching case and apply the corresponding algorithm.
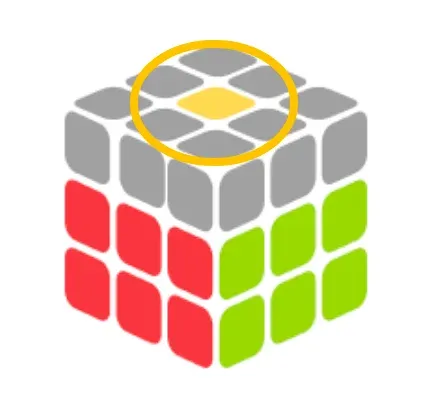
- Case 1. Dot (No Yellow Edge Stickers)
In this case, only the yellow center is showing on the top face, with no yellow edge pieces around it. Hold the cube with the yellow dot facing up and perform the following algorithm: F R U R' U' F'
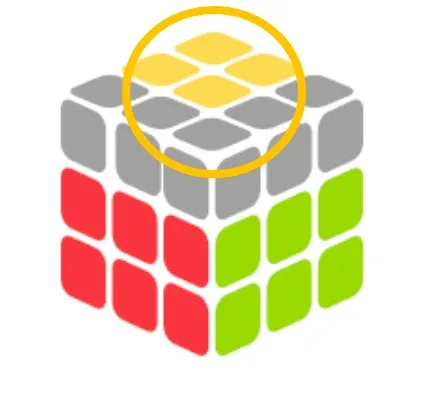
In this case, two yellow edge stickers form an "L" shape on the top face. The yellow "L" should be positioned in the top-left corner, pointing to the left and down (like this ⌜). Hold the cube in that position and perform the following algorithm: F R U R' U' F'
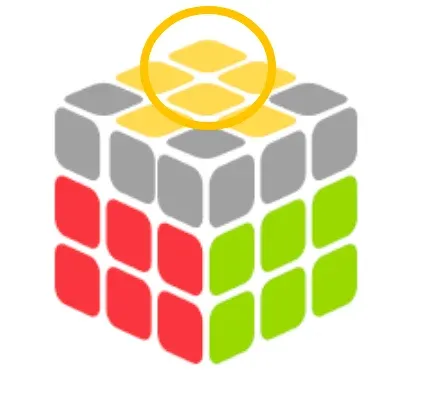
Here, the top face shows a straight line made of three yellow stickers. Make sure the line is horizontal—going left to right—not vertical. Hold the cube with the yellow line running across the middle of the top face, then perform the same algorithm: F R U R' U' F'

Step 2. Make the Whole Top Yellow (orient all yellow corners)
Now that you've made a yellow cross on the top face, the next step is to rotate the yellow corners so the entire top face becomes yellow. We'll guide you through each case—how to identify the pattern, how to hold the cube, and which algorithm to use.
- Case 1. Sune (Most Common Case)
In this case, only one yellow corner is correctly oriented. Hold the yellow corner in the front-left and perform the following algorithm: R U R' U R U2 R'. This turns all the top stickers yellow in one go.
In this case, only one yellow corner is correctly oriented, just like the Sune case, but the pattern is mirrored. Hold the cube so that the correctly oriented yellow corner is in the front-right position. Then perform the following algorithm: R' U' R U' R' U2 R
Two yellow stickers appear on the same side, next to each other like car headlights. Hold the two yellow stickers facing you and then perform the following algorithm: R2 D R' U2 R D' R' U2 R'
- Case 4. Chameleon (Bowtie)
This case features two correctly oriented yellow corners placed diagonally from each other, forming a bowtie shape. Hold the cube and apply the following algorithm: F R U R' U' R U R' U' F'
If there are two yellow stickers on adjacent corners—one on the front-left and the other on the back-right. To fix the corner orientation, perform this algorithm: F U R U' R2 F' R U R U' R'
This pattern shows a yellow "T" on the cube. You just need to hold the cube so the "T" is facing you. Then perform the following algorithm: R U R' U' R' F R2 U R' U' F'
Yellow corners are next to each other, forming a U shape. Hold the yellow stickers on the left and back. Algorithm: R2 D' R U2 R' D R U2 R
The yellow corners form a "U" pattern on the top face. Hold the cube so the yellow stickers are on the left and back sides. Then apply the algorithm: R2 D' R U2 R' D R U2 R
PLL (Permuting Last Layer)
Now it's time to finish the cube by placing the last layer pieces in their correct positions without changing their orientation. Since the yellow stickers are already facing up from the previous step called OLL, this stage called PLL focuses only on moving the corner and edge pieces around the top layer.
- Permute the Yellow Corners (Put them in the right spots)
- Permute the Yellow Edges (Cycle the edges into place)

To Sum Up
The CFOP tutorial is more than just a solving method. It's a complete system built for precision, rhythm, and purpose. It trains you to recognize patterns quickly, move with confidence, and build habits that lead to faster and more consistent solutions.
CFOP FAQ
Q: Which is faster, ZZ or CFOP?
CFOP is generally faster than ZZ for most speedcubers. CFOP is more efficient with its optimized algorithms for F2L, OLL, and PLL. While ZZ has its advantages, especially in edge orientation during F2L, CFOP is preferred by most top-level solvers due to its overall speed. The speed of each method depends on the solver's practice and familiarity.
Q: Is the CFOP method hard?
The CFOP method can be challenging at first due to the need to learn several algorithms. However, with practice, it becomes easier and helps improve solving speed. It's a great method for advancing beyond basic solving techniques.
Q: What does CFOP stand for?
CFOP stands for Cross, F2L (First Two Layers), OLL (Orient Last Layer), and PLL (Permute Last Layer). These four steps form one of the most popular methods for solving a 3×3 Rubik's Cube.
Q: What's the hardest part of CFOP?
For many cubers, F2L (First Two Layers) is the hardest part of CFOP. It requires recognizing piece pairs and inserting them efficiently without disturbing solved pieces.
Q: Is CFOP the best method for solving a Rubik's Cube?
CFOP is one of the most widely used Rubik's Cube solving methods, especially in competitive speedcubing. Many professional cubers use it because it allows very fast solving times.
Q: Is the CFOP method good for beginners?
Yes. Beginners can learn CFOP step by step, starting with the Cross and basic F2L, then gradually learning OLL and PLL algorithms as they improve.