No headings found
Rubik's Cube art is a form of mosaic that turns many cubes into pixel-style images such as portraits, logos, or scenes. By arranging cubes in a color grid, builders create large artworks that become clear from a distance. In this guide, you'll learn how Rubik's Cube art works and how to make your first cube mosaic.
What Is Rubik's Cube Art
Rubik's Cube art, also called Rubik's Cube mosaic art or Rubik's Cube pixel art, is a form of pixel-style artwork created by arranging many Rubik's Cubes into a grid. Each cube shows one colored face in the mosaic, and together these cubes form a larger Rubik's Cube picture such as a portrait, logo, or scene.
Famous Examples of Rubik's Cube Art
Rubik's Cube art appears in many styles, and some designs have become iconic examples of cool Rubik's Cube art because they translate well into cube mosaics. Designs with clear shapes, strong contrast, and limited colors tend to produce the most recognizable results when viewed from a distance. Here are some common and inspiring forms of Rubik's Cube art:
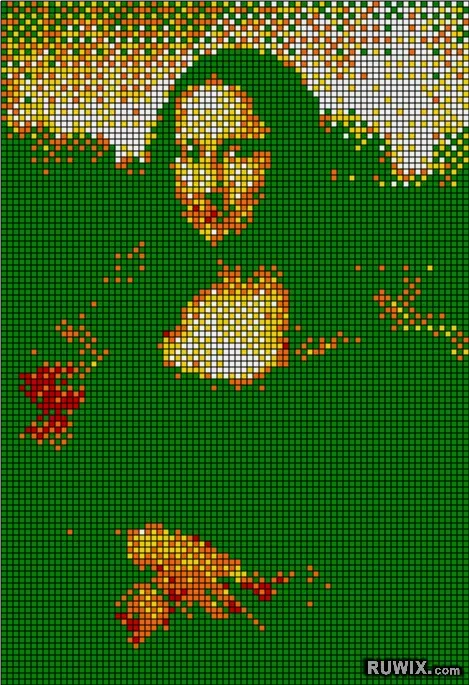
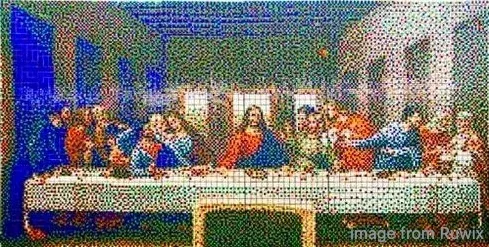
- Mona Lisa cube mosaic
One of the most famous works is Mona Lisa Rubik's Cube art, where hundreds of cubes are arranged to recreate Leonardo da Vinci's painting. This type of cube art shows how a classic painting can be transformed into large-scale work.
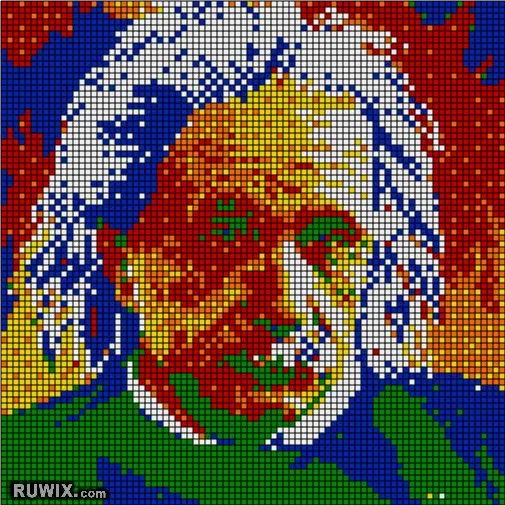
- Einstein portrait
Portrait mosaics of Albert Einstein are popular because the strong contrast in his hair and facial features translates well into cube colors.
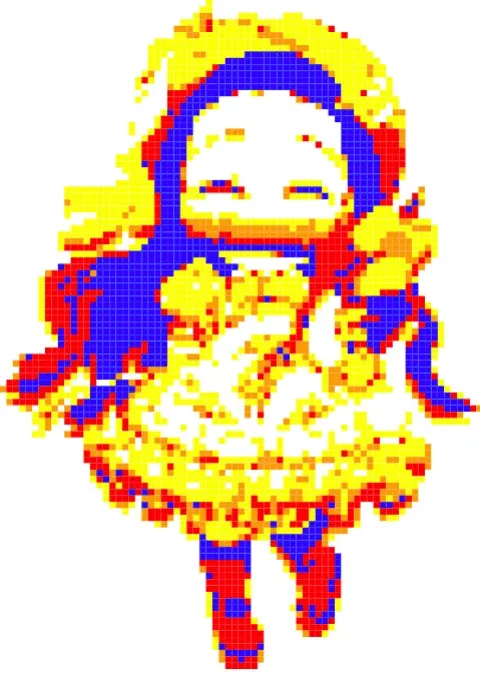
- Anime characters
Many builders create anime or game characters using cube mosaics. These designs work well because bold outlines and simple color blocks resemble pixel art.
- Giant cube walls
Large installations sometimes use hundreds or thousands of cubes to build giant Rubik's Cube art across an entire wall. These projects often appear as public Rubik's Cube wall art in exhibitions, schools, or community events.
How to Make Rubik's Cube Art
Creating art Rubik's Cube becomes much easier when you follow a clear process. Instead of experimenting randomly with cube colors, start with a planned workflow that converts an image into a cube mosaic and then builds it step by step.
Step 1. Choose a Clear Image
Start with an image that works well at low resolution. Designs with strong contrast, a clear subject, and simple colors are much easier to translate into cube mosaics.
Portraits with strong lighting, bold logos, or simple graphics usually produce the cleanest results. If the subject is still recognizable when the image is zoomed out or slightly pixelated, it will likely work well for cube art.
Step 2. Convert the Image into a Cube Mosaic
Next, convert your image into a grid that represents the cube layout. Each cell in the grid corresponds to one cube in the final mosaic.
Many builders do this by pixelating the image in photo editing software or by using simple mosaic planning tools. The goal is to reduce the image into larger color blocks that can be represented by cube faces.
Step 3. Determine Cube Color Orientation
Once the mosaic grid is ready, each cube needs to show a specific color on its front face. That means every cube must be oriented, so the correct color appears in the correct position of the grid.
Some builders prepare cubes in advance and rotate them to the needed front color before placing them. In more complex builds, people may also use basic Rubik's Cube art algorithms or simple turning sequences to quickly reach the required color orientation.
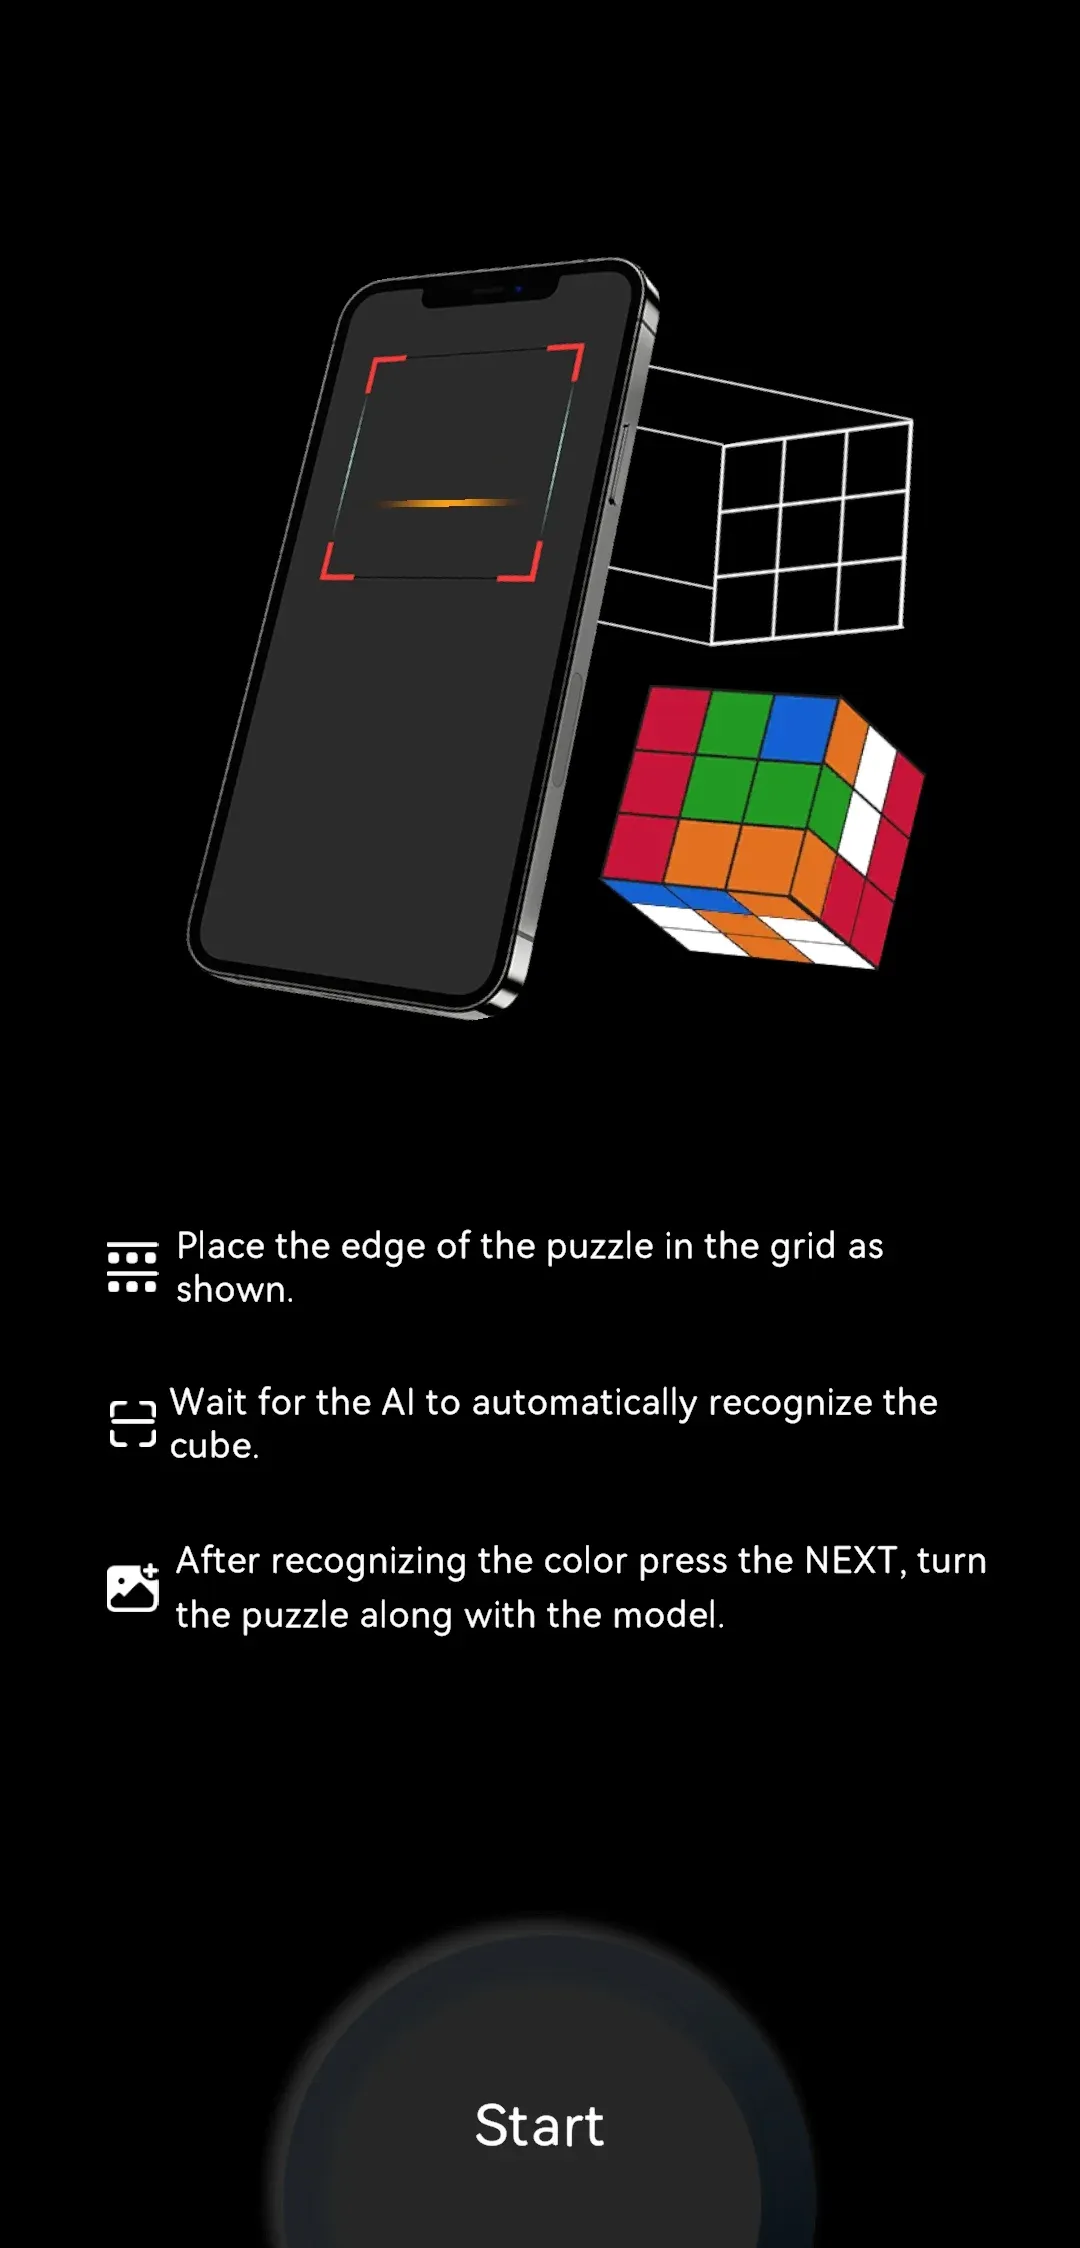
If you are using standard 2×2, 3×3, or 4×4 cubes and are unsure how to reach a specific cube state, a cube solver such as CubeSolver can generate the solving steps for you. This can help you quickly position the correct face color before placing the cube into the mosaic.
CubeSolver AI
Step 4. Assemble the Mosaic
Finally, build the artwork by placing cubes according to the grid pattern. Arrange them row by row, verifying each row before moving to the next.
It also helps to mark the grid layout on your board or table so each cube has a clear position. As the rows fill in, the larger image gradually becomes visible from a distance.
Tips for Better Rubik's Cube Art
Even with a good image and a clear grid plan, small decisions during preparation and building can greatly affect how the final mosaic looks. The following practical tips can help you produce cleaner Rubik's Cube art drawing and avoid common beginner mistakes.
- Use high-contrast images. Images with strong light–dark contrast make the subject easier to recognize when reduced to cube colors.
- Limit the number of colors. Rubik's Cubes have a fixed color palette, so simplifying the image into fewer color regions helps the mosaic look cleaner.
- Start with a smaller grid. A smaller mosaic is easier to plan and correct. Once you complete one clean build, you can scale up to larger murals.
- Use a mosaic generator for planning. Image-to-mosaic tools can help convert pictures into pixel-style grids, making it easier to visualize how the final cube artwork will look.
- Check the image from a distance. Cube mosaics are designed to be viewed from afar. Step back occasionally to see whether the subject reads clearly.
Closing Words
Rubik's Cube art becomes much easier with a clear process: choose a readable image, set a realistic grid, plan the placement, build row by row, and review the result from a distance. Start with a simple logo or portrait at a moderate size, then scale up after completing one clean mosaic. The goal at the beginning is not maximum detail but a simple process you can repeat with confidence.
Rubik's Cube Art FAQ
Do I need to solve cubes fast to make Rubik's Cube art?
No. Speed helps only after your mapping and placement system is stable. Beginners get better results by slowing down, checking rows, and protecting coordinates. Accuracy beats turning speed in early projects.
How do I choose an image for a Rubik's Cube mosaic?
Choose images with clear silhouette, strong contrast, and limited background clutter. Test readability by shrinking the image and checking whether the subject still reads at low resolution. If it disappears, simplify before building.
How do I fix mistakes fast without rebuilding the whole mural?
Mark the exact coordinates that hurt readability, then replace only those cells. Start with major edges and dark-light boundary zones. This targeted method is usually faster and safer than restarting full sections.
How long does Rubik's Cube art take to finish?
Time depends on grid size, image complexity, and how disciplined your row checks are. Planning and verification usually take more time than turning cubes. A clear map shortens total time because it prevents large correction loops.

Kelsey Geller focuses on practical Rubik's Cube learning for beginners. Her guides simplify complex steps, explain the "why" behind moves, and help new cubers build confidence with a reliable solving approach. Every guide follows CubeSolver's editorial review standards before publishing.